
Scree Painter Manual
Installation
After downloading, decompress the file (if not automatically done by your browser) and copy Scree Painter to any folder on your hard disk. To run Scree Painter, double-click its icon. If you have troubles starting on Mac OS X, see here.Quick Start Tutorial
For a quick and easy start with Scree Painter, it is recommended that you follow the steps of this short tutorial. A sample input data set is available.Settings
The left side of the window has controls to adjust scree stones and gully lines:Data Import and Export
- Input Data dialog – data sets used to generate scree stones.
- Save and load settings – store parameters in files.
- Export scree – save scree to graphics files.
- Export & import gully lines – edit gully lines with a GIS.
Batch Mode
Scree Painter 1.2 and above can be run in batch mode from the console. This is useful for automating the generation of scree for a series of map sheets.Speed of Computations
When generating scree dots for a larges map sheet with a lot of scree areas, the computations may take a while.To accelerate scree generation while experimenting with different parameters use the Update Area feature. Read more about it in the right column.Toolbar
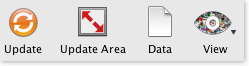
Press the orange Update button after changing any parameter or after changing any input data set. When pressed, Scree Painter will regenerate the scree stones.
Press the Update Area toggle button to change the area that is filled with scree. When the Update Area button is pressed, a red box is shown on the map, which is filled with scree stones. Generating scree may take some time for large map sheets. During experimentation with different parameter settings, you may want to limit the generation of scree to the red box to accelerate the fine-tuning of parameters. The size and location of the Update Area can be adjusted with the arrow tool.
Press the Data button to open the Input Data dialog for selecting data sets used by Scree Painter.
Use the View button to select the data set displayed in the map.
Use the buttons above to zoom and pan, and to measure distances and angles. The last button in the row adjusts the zoom level to show all loaded data sets.